Sunday, October 21, 2012

White Chocolate Bark

If you are a Facebook friend of mine, you already know that we had a fire in our home last week. Gratefully, no one was hurt and nothing was lost….just a lot of smoke and soot damage.  For the past 10 days, there have been many people traipsing through our home, cleaning walls, ceilings, furniture, carpets and drapes.  They took all of our clothes to have them dry cleaned, along with every rug, pillow, bedspread and tablecloth we own.  With all of this going on, you can be sure that the furthest thing from my mind was cooking anything.  But I made a promise to post a recipe every 2 weeks, and I’m committed to keeping that promise.  So I inventoried my pantry at 10:00am and was nibbling on these delicious treats at 10:30am.  It doesn’t get easier than that.

Ingredients:
§     2 pounds white chocolate, finely chopped
§     1 cup almonds, slivered or sliced
§     1 cup dried cranberries
§     1/2 cup chopped pecans

Optional Toppings
§     Peppermint candy, finely chopped
§     Pretzels, roughly chopped
§     Mini M&M Candies
§     Walnuts
§     Raisins
§     Chocolate Chips

Line a cookie sheet with parchment paper, allowing the paper to hang over the sides.  Preheat oven to 350 degrees.  To toast the pecans, place them in a single layer on a sheet pan and bake for 5 minutes.  Remove from oven and set aside to cool.
Once the nuts are cooled, chop coarsely.  I prefer to use slivered or sliced almonds because they are ready to use, but today I only had whole almonds in my pantry, so I cut each almond into thirds.  I chopped them by hand because I like to recognize the almond on the bark.  If I run then through the food processor, they become powdery.  Chop the white chocolate and place into a glass bowl.  Melt the chocolate in the microwave, stirring with a rubber spatula every 30 seconds until smooth and creamy.  Depending on how finely you chopped the chocolate, this process should take between 1 - 3 minutes total.  
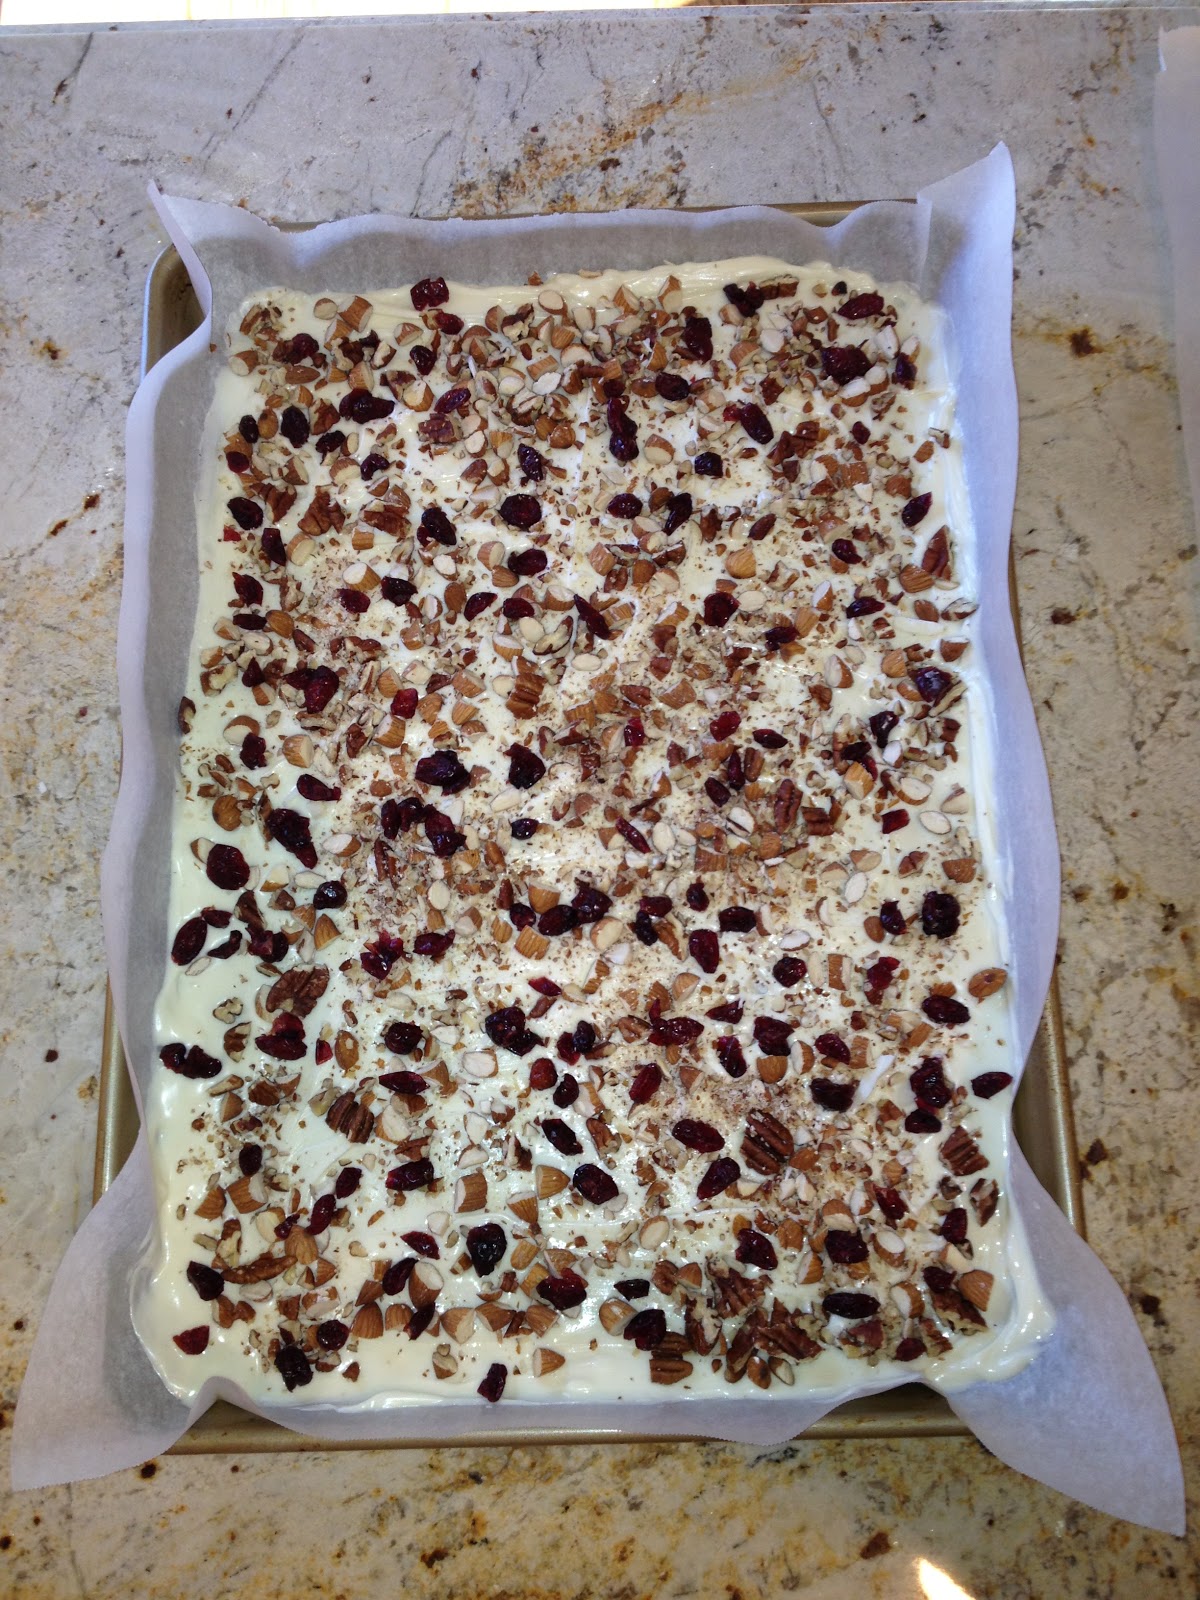
Pour the chocolate onto the prepared sheet and spread to cover the entire surface and form an even layer.  Sprinkle the top evenly with the nuts and cranberries.
Gently press the toppings into the melted chocolate.  Set aside to cool.  When firm, cut or break into small pieces.

Serve at room temperature. White Chocolate Bank stores well at room temperature in an air tight container.  For a printer friendly copy of this recipe, go to White Chocolate Bark. Enjoy!

Sunday, October 7, 2012

Black Bean and Corn Chili

For years I denied myself chili.  The reason is that the main spice ingredient in chili is cumin, a spice I’m not a fan of.  I love meat and I love beans so I felt deprived until one day I decided to create my own chili recipe where cumin was not the prominent flavor.  Yes, I know it wouldn’t…and shouldn’t….be called chili if it doesn’t have cumin, so I do include a little, but it’s definitely not the primary flavor. When I shared my unconventional chili with friends, I was thrilled to learn that others enjoyed it as much as I.  Actually, I wasn’t going to share my chili recipe because it continually changes depending on what I have on hand, but I've had four recent requests for the recipe so I guess this has become another of "My Most Requested Recipes." 
For this blog post I am documenting each and every time I add something to the pot so I will have an exact recipe, but feel free to alter the ingredients to accommodate your own taste.  I love beans, so I add a lot of them.  You can leave out 2 or 3 cans of beans.  I like my chili thick and hearty.  If you like a more soupy chili, add more broth or water.  You may want to add more heat, so add a tablespoon of Cayenne. 

I buy cans of beans when they are ‘buy one get one free’ at the market.  Today I happen to have Black Beans, Red Kidney Beans, Cannelloni Beans, Chili Beans, Northern Beans and Mixed Beans, so that’s what I’m including.  The types of beans I use changes, but I always include red kidney beans, black beans and yellow corn.  It just wouldn’t be my chili without them.  I typically add 1 large can of tomato sauce and 1 small can of tomato paste, but I don’t have tomato sauce in my pantry today so I’m adding a can of diced tomatoes which is not as rich as tomato sauce and 2 cans of tomato paste to make up for the richness.
Ingredients:
§     3 Tablespoons of oil, to coat the bottom of the pot
§     1 large onion, chopped
§     4 garlic cloves, finely chopped
§     3 lbs chopped beef
§     1 Tablespoon smoked paprika
§     2 Tablespoons chili powder
§     1 teaspoon cumin
§     1 teaspoon black pepper
§     2 Tablespoons Worcestershire Sauce
§     3 Tablespoons Ketchup
§     3 Tablespoons salt
§     3 Tablespoons brown sugar
§     1 Tablespoon red pepper flakes
§     1 28oz can stewed tomatoes
§     1 14.5oz can diced tomatoes
§     2 6oz cans tomato paste
§     1 16oz can beef stock
§     1 16oz can Black Beans
§     1 16oz can Red Kidney Beans
§     1 16oz can Chili Beans
§     1 16oz can Cannelloni Beans
§     1 16oz can Great Northern Beans
§     1 16oz can Mixed Beans
§     1 15.25oz can Yellow Corn
§     Salt and freshly ground pepper to taste

Add enough oil to coat the bottom of a large, heavy pot.  Heat oil over medium-high heat and add onions and garlic.  Sauté for about 6 – 8 minutes or until the onions are translucent. 

Add ground beef and cook until brown, breaking up the meat as it cooks.  Add the next 9 ingredients and stir to mix thoroughly. 

Stir in tomatoes, tomato paste and beef stock.  Drain and rinse the beans and corn and add to the Chili. Reduce heat and simmer for 1 hour stirring occasionally.  If the mixture looks dry, add water or additional beef stock.  Add salt and pepper to taste.  This dish can be made ahead and will probably taste better the next day. 
Although a bowl of this chili with a few corn chips for crunch is enough to satisfy any taste, below are additional serving suggestions:
§     Serve over rice
§     Top with cheddar cheese, sour cream and chopped green onion
§     Serve over pasta

Chili freezes very well.  I always make a huge pot and freeze it in 'dinner for two' portions.  My secret for freezing anything that has liquid is to place the container in the freezer and freeze the contents before replacing the lid.  This gives the food room to expand without cracking my container.  After the food is frozen and has expanded, I replace the cover.  Using this method, I am able to freeze foods that I have made as edible gifts in pretty jars. 
For a printer friendly copy of this recipe, go to Black Bean and Corn Chili. Enjoy!